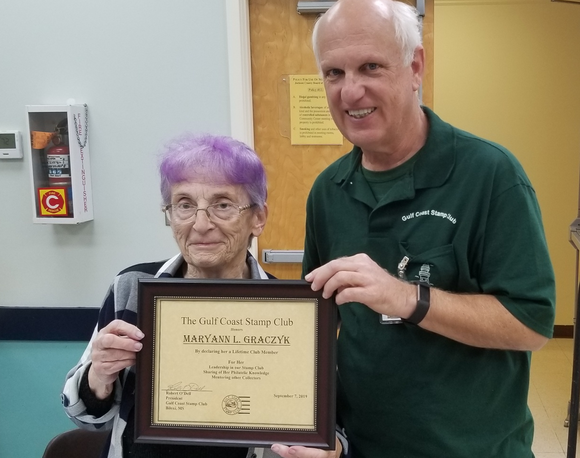
GCSC Lifetime Members
|
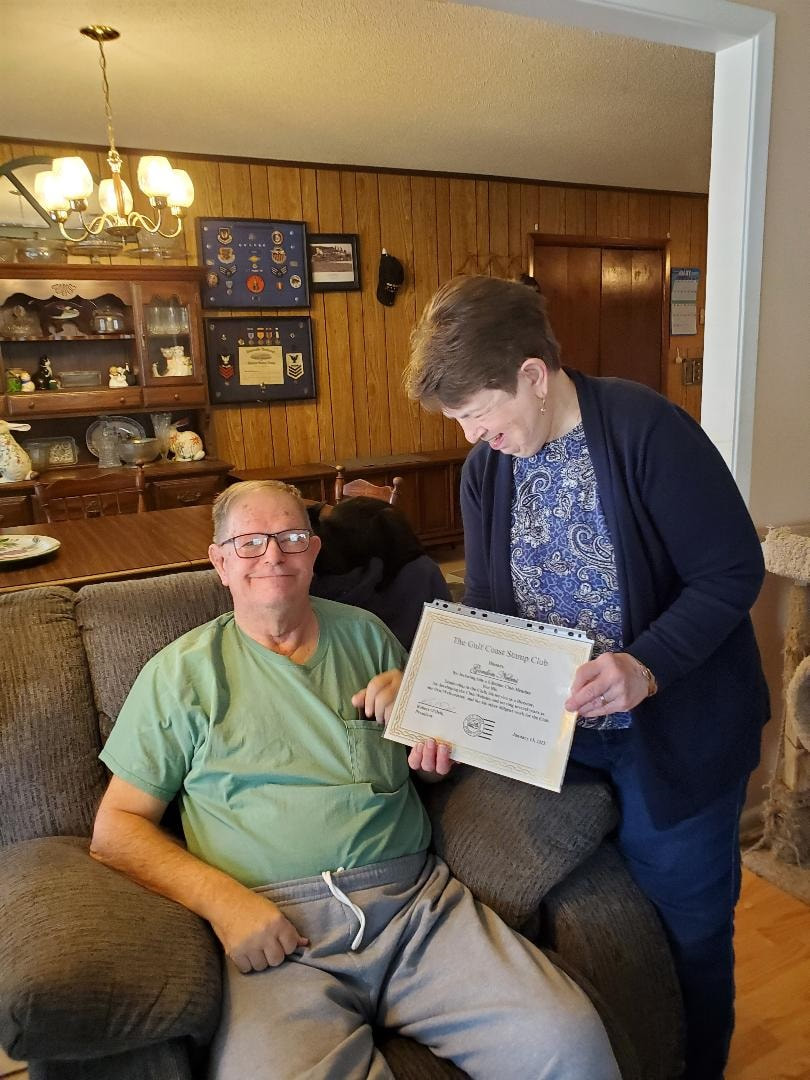
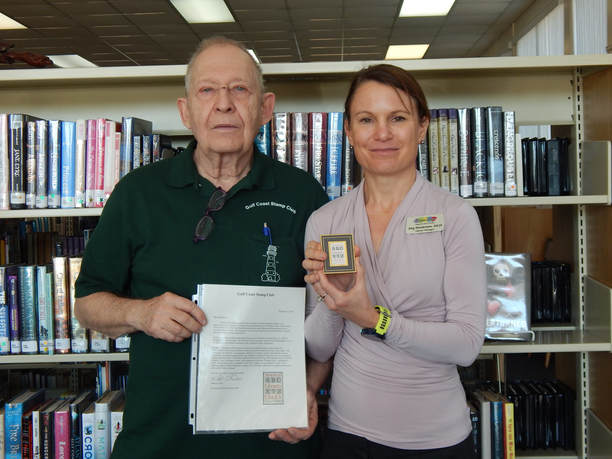
Club member Cathy Marousky presents a lifetime membership certificate to Gordon Nelms. On the wall behind Gordon directly above his head the shadow box on the top are all the awards and medals awarded to SSgt Gordon Nelms. The photo to the right of that shadow box is a photo of the F4 fighter jet that Gordon was Crew Chief for while stationed at RAF Bentwaters in England. Gordon served as the GCSC webmaster from 2014-2022.
|
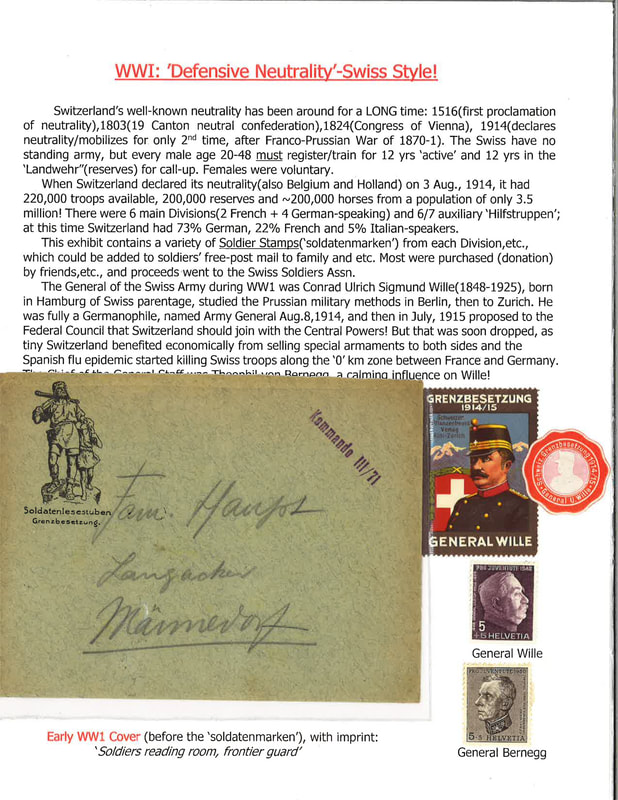
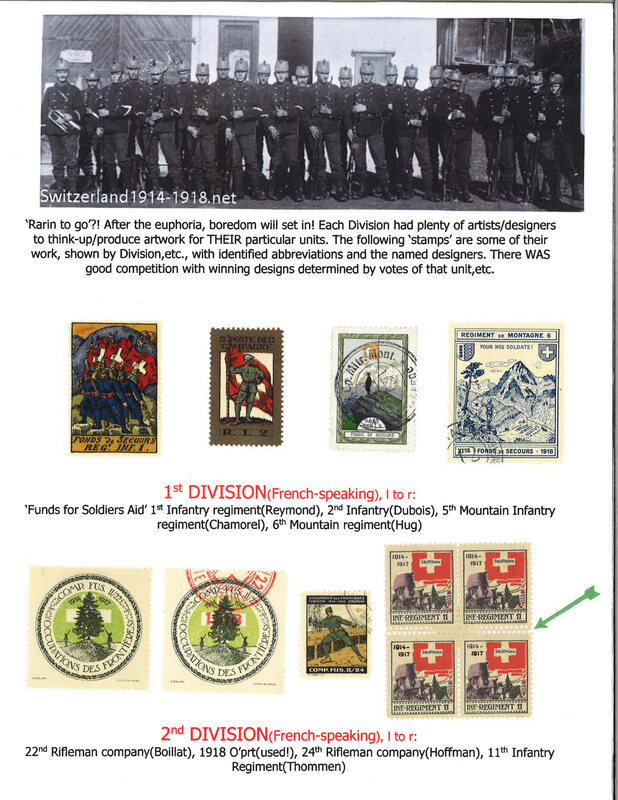
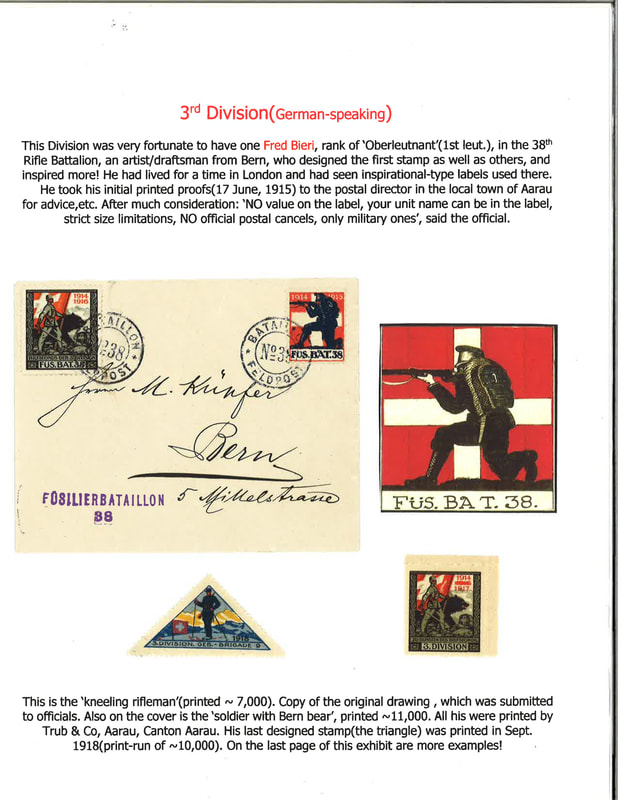
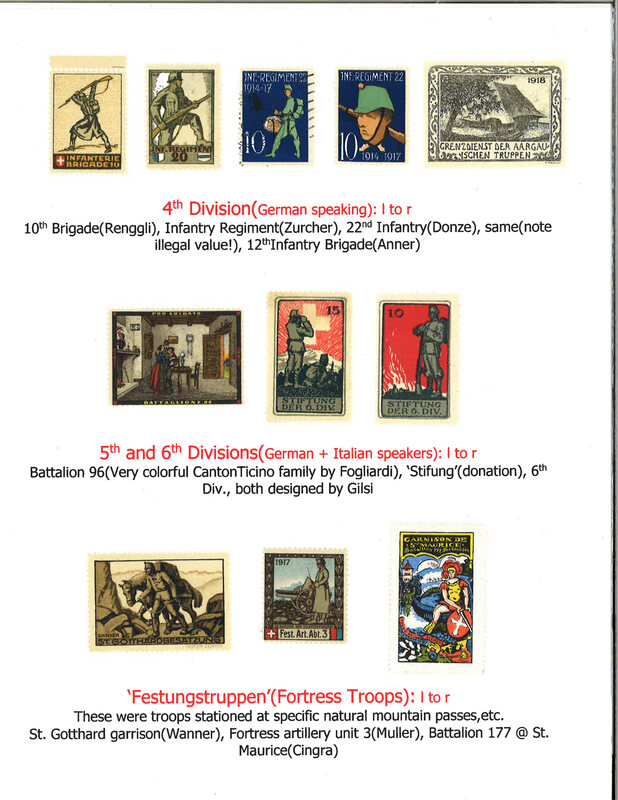
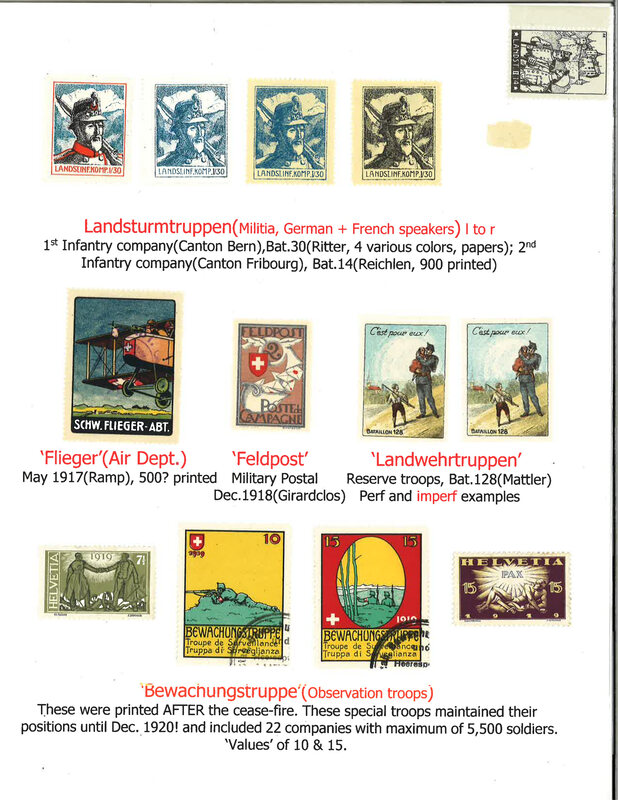
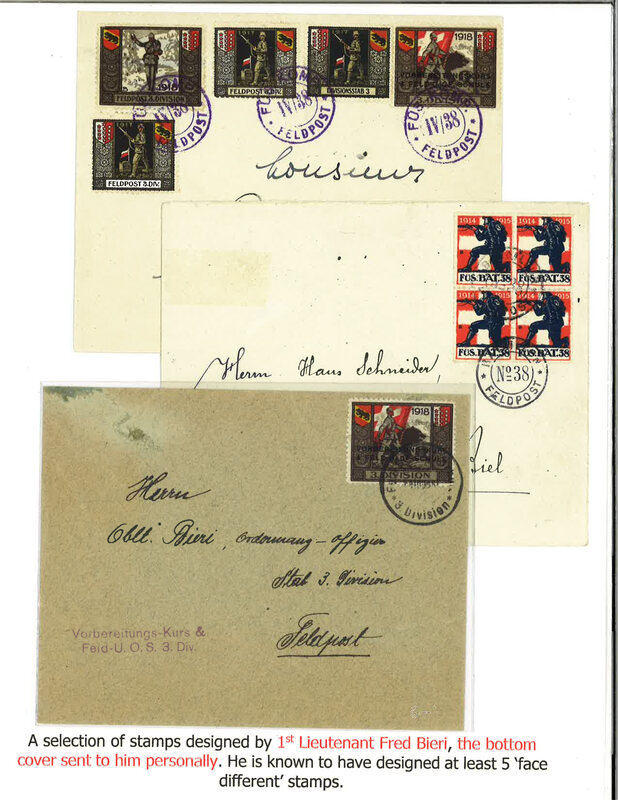
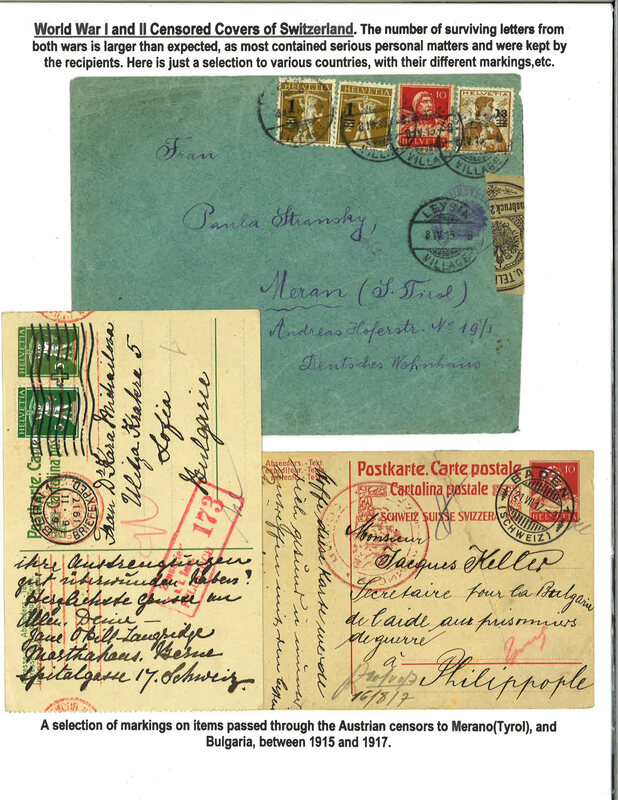
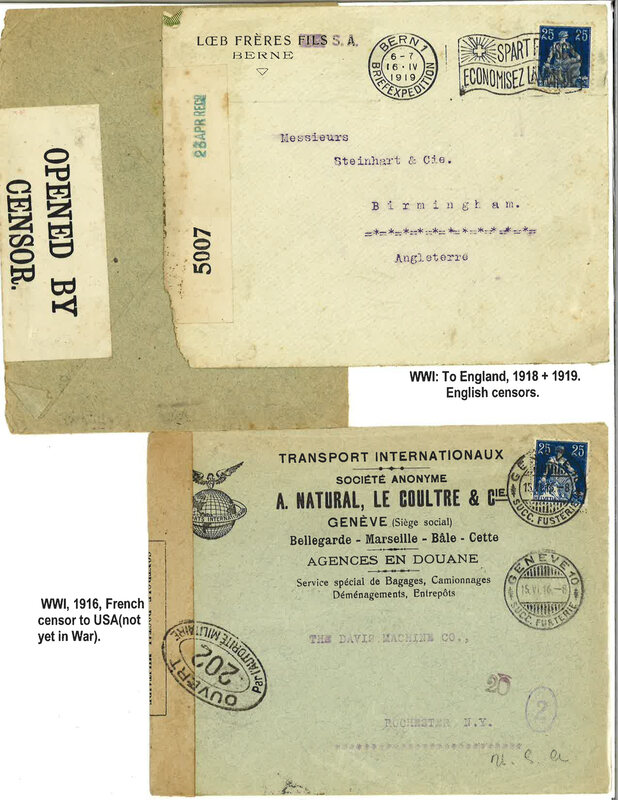
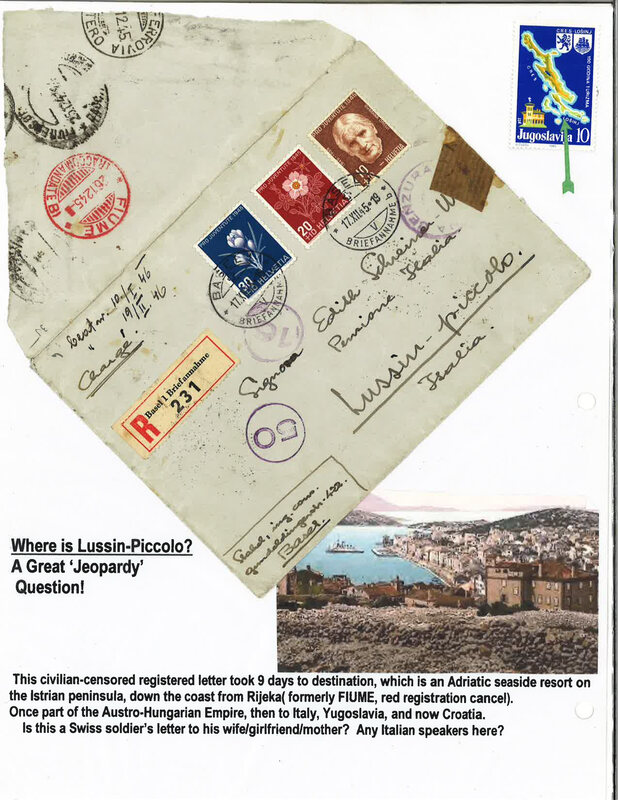
Dr. John Barrett's collection of The Great War's philatelic items.
To see a larger image simply click on that image.
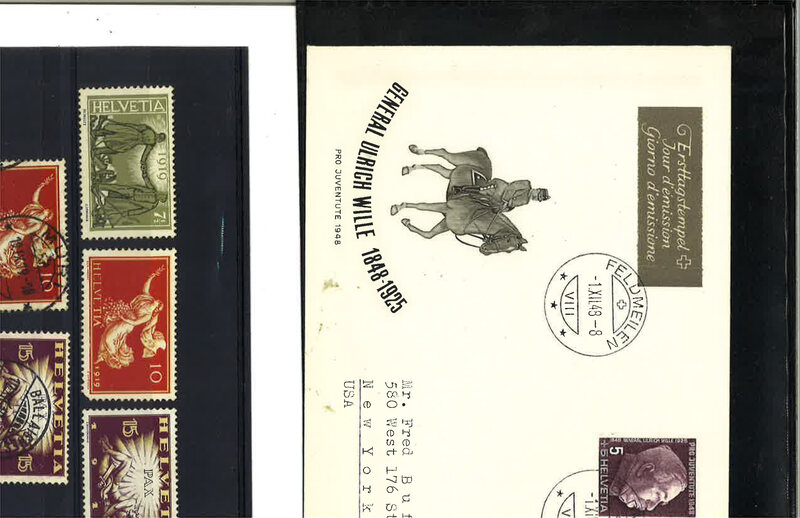
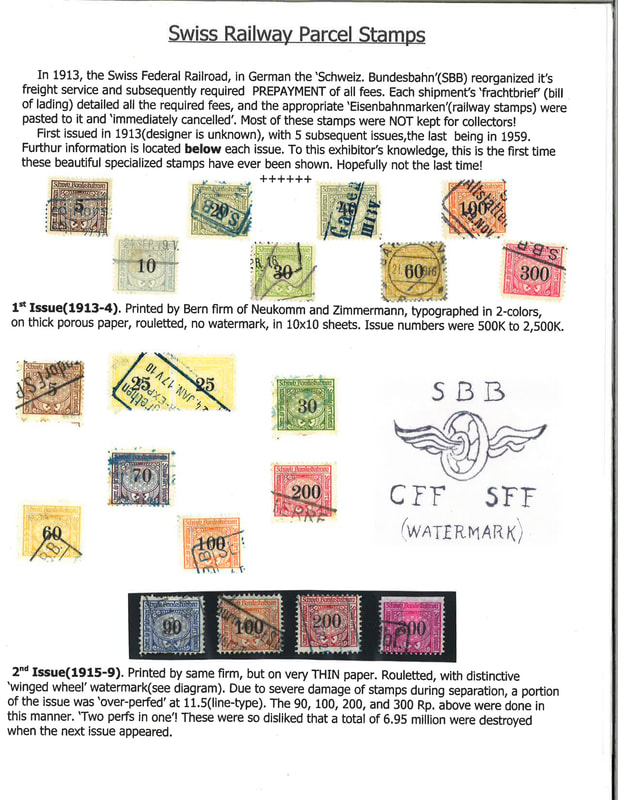
This is a part of his larger collection of Swiss philatelia.
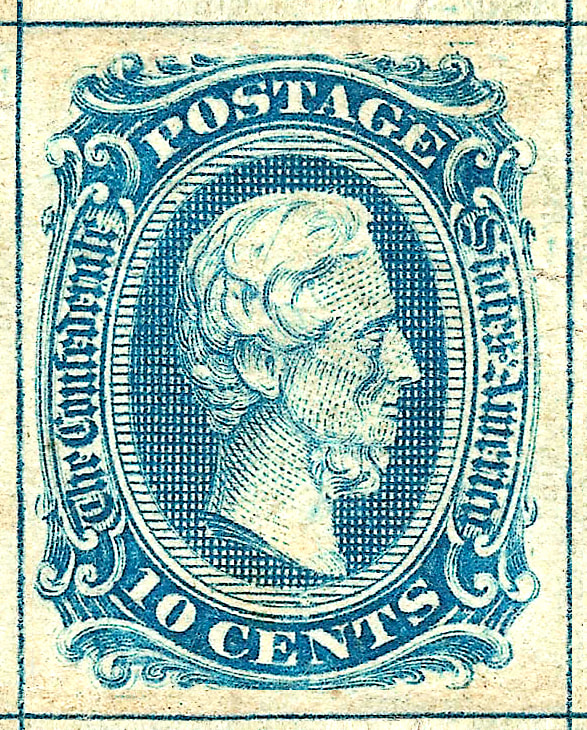
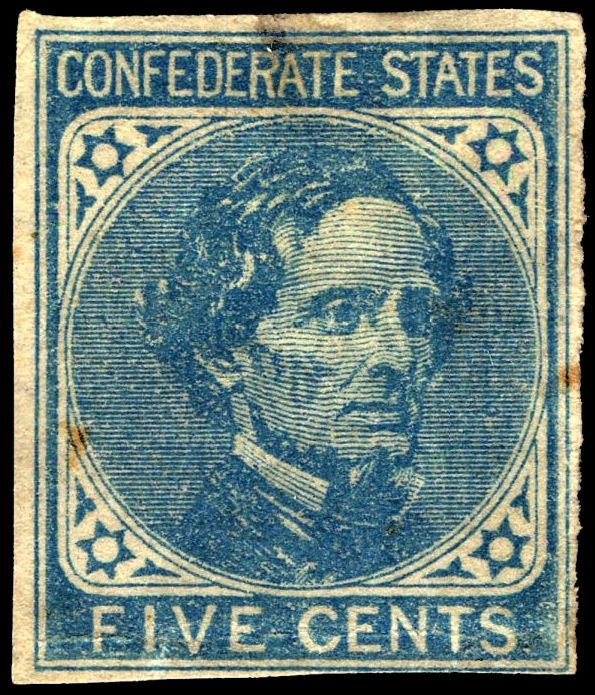
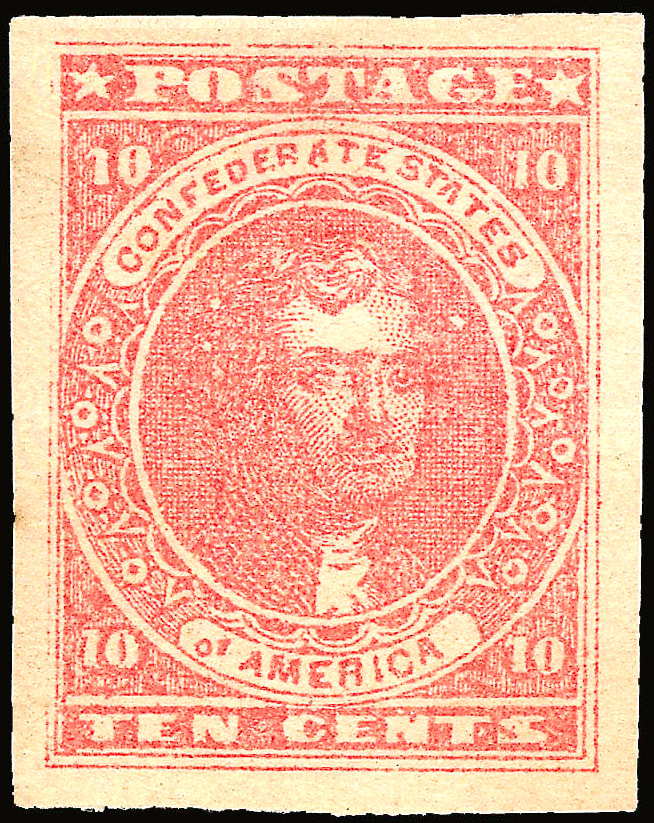
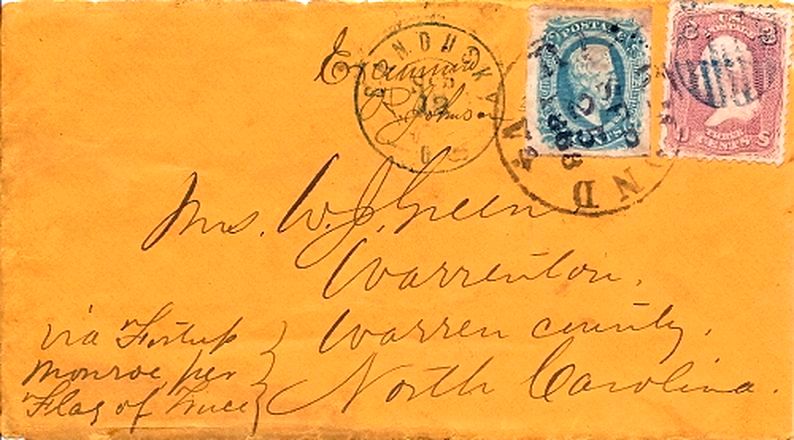
POSTAGE STAMPS OF THE CONFEDERATE STATES OF AMERICA
By: Rob O’Dell
January 3, 2020
 CSA Postmaster Reagan
Since necessity is the mother of invention, it is not surprising that Confederate stamps, produced in a mere four years, employed the broadest methods of production of stamps of any country. Printing processes ran the gambit, from Woodcut and printers’ type (Postmasters provisionals), to stone lithography, steel engravings cut in relief, and line engraving (intaglio) on both copper and steel printing plates.
The Confederate States of America existed from February 8, 1861 to May 5, 1865. It was comprised of the eleven Southeastern States from Virginia to Texas. Obviously, after secession of those states and formation of the Confederate States, development of a national post office, with issuance of postage stamps for pre-paid mail, became a priority.
The Confederate States of America Post Office Department was established on February 21, 1861. John H. Reagan was appointed to be the Confederate Postmaster General and operations began on June 1, 1861. Under John Reagan, the Confederate States of America Post Office was efficiently run throughout the war.
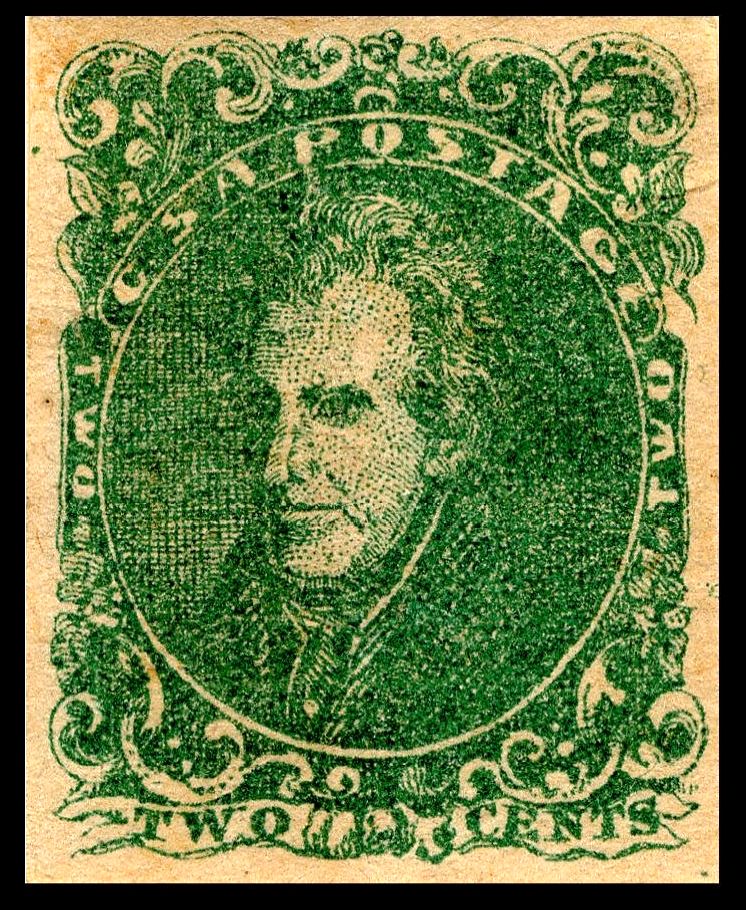
Although Postmaster Reagan wanted to produce engraved stamps, the South lacked the skilled engravers necessary to produce them. As a stop-gap measure stamps in the initially desired denominations of 2¢, 5¢, and 10¢ were contracted for printing with the Richmond, VA printing firm of Hoyer & Ludwig to be produced using the stone lithography process.
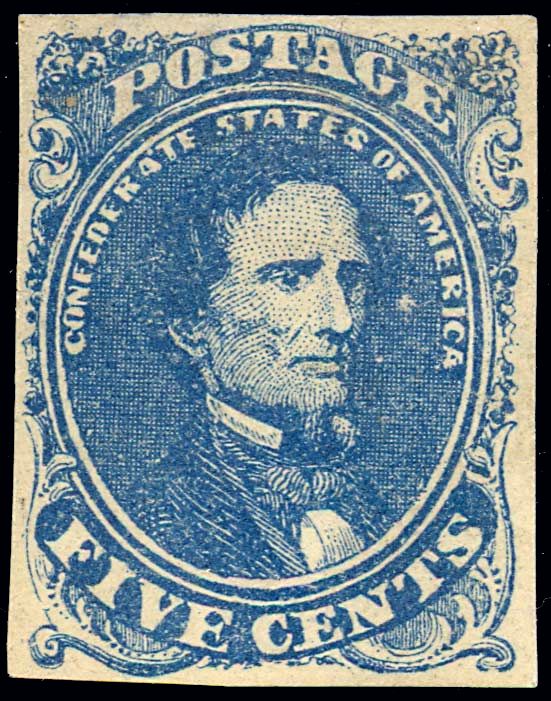
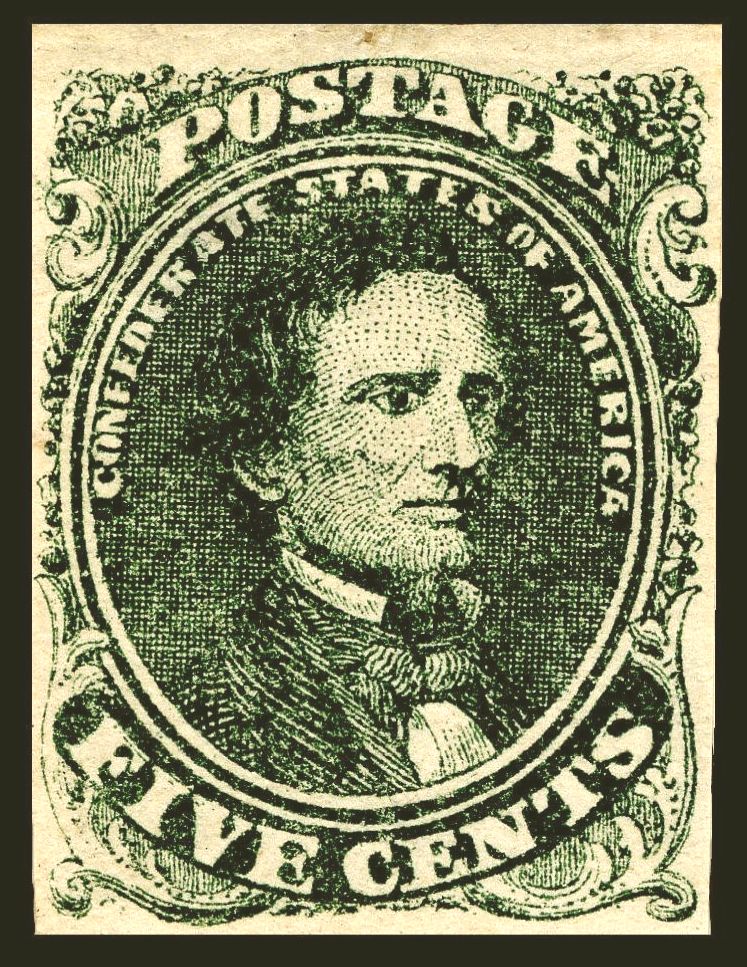
The stone printing technique is fairly complex. The end result is production of sheets of 200 subjects by pressing and lifting dampened paper to and from a finely grained limestone “stone”. The stamps thus printed were Confederate States of America (CSA) 1 through CSA 5, which were larger than the later typographic and engraved issues. They were generally used from October, 1861 throughout 1862, and until existing supplies were exhausted in early 1863. CSA 1-5 were initially produced for use according to the following rates:
2¢ for drop letter for pick up at the same Post Office;
5¢ for ½ oz. for under 500 (road) miles;
10¢ per ½ oz. over 500 miles.
CSA 1 (the 5¢ Green Davis) and CSA 3 (the 2¢ Green Jackson) were printed in very similar green colors and were commonly confused. Due to this “color confusion” single weight first class covers bearing the 2¢ Jackson, and marking of “Due 3”, are not unusual among the CSA 3 covers available to collectors. In order to address the problem, the color of the 5¢ Davis was changed to blue in early 1862. Such numbers were printed in the remaining first half of 1862 that CSA 4 (blue 5¢ Davis) is more common than CSA 1, both used and unused.
The stone lithographs were first succeeded by stamps produced by a printing method called typography. Typography is the most ancient known printing method. For the production of those stamps, CSA 6, 7, and 14, metal plates with designs raised in relief (like the letters on children’s blocks) were produced in England, and then run through the Union blockade along with large numbers of stamps printed from the plates in England (CSA 6 and 14). CSA 7 was printed in Richmond, VA by Hoyer & Ludwig Company.
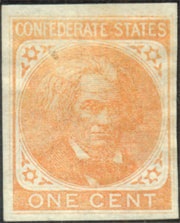
On July 1, 1862, the first class rate for all letters was changed to 10¢ per ½ oz. for any distance, thus no further 5¢ stamps were needed. However, the blue five cent Jefferson Davis (CSA 6 and 7) stamps, were used from April 1862 through nearly the end of the War. CSA 7 was actually continued in production into the Spring of 1864, overlapping the later 10¢ engraved stamps. CSA 14, the orange one cent Calhoun printed only in England was not issued by the Confederate Postal Service, since a planned 1¢ drop rate was never adopted.
In 1863 Postmaster Regan finally got the engraved stamps that he desired in the form of CSA 8-13. All are line engraved stamps printed by intaglio by Archer & Daly and/or Keatinge & Ball in Richmond. CSA 8 is the engraved 2¢ red-brown Jackson used for the drop rate. It was produced in two distinct printings. The first, in the Spring of 1863, is characterized by a pale rose color. The second printing, in 1864, produced the deep red-brown color subjects. The stamp was little used, thus used examples are far more rare than unused.
CSA 10 is the most rare of all CSA stamps. It is the 10¢ Archer & Daly engraved printing with “frame lines”. The grid pattern lines on the plate were cut to aid in lining up and centering transfers from die to plate. The copper plate produced was experimental and made before Archer & Daly (A&D) even had a contract. The “frame line” stamps were sent to the Confederate Postal Service, and were issued in small numbers beginning in April, 1863.
CSA 9 (the “Ten Cents”) was the initial line engraved issue produced by A&D pursuant to contract with the Confederate Postal Service. It is the second rarest CSA stamp primarily due to the fact that it was printed on a copper plate that quickly wore out. Although it exemplifies very fine engraving, the portrait of Davis was disliked by many, including the President’s wife, Varina Davis, for “resembling Lincoln”. It had an earliest date of use of April 23, 1863.
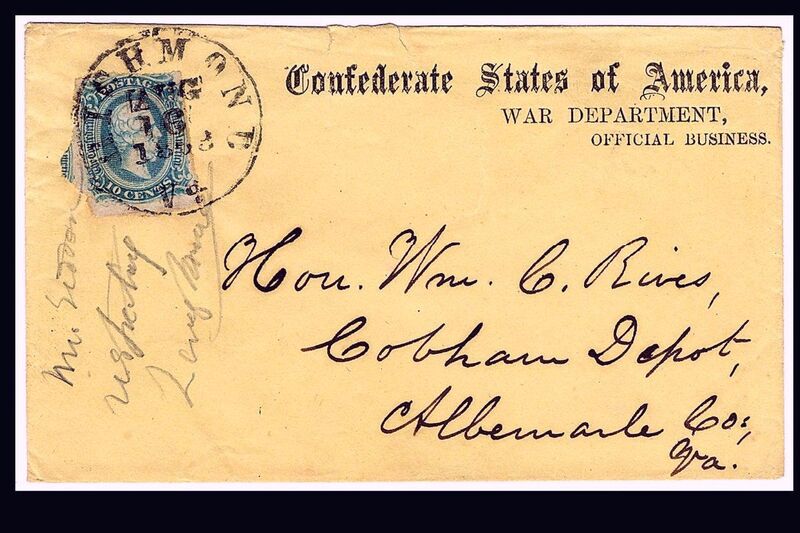
CSA 11, the A&D engraved “10 cents” was (along with the CSA 12), a workhorse of the Confederate Postal Service. It was produced on new steel plates from the same dies as the frame line (CSA 10). An estimated 23,800,000 were produced. It was used from April 21, 1863 through the remainder of the War. It was printed in five colors from light to dark blue and blue-green.
In late 1862 or early 1863, master engraver Frederick Halpin, was enticed to Richmond from New York City to work for Archer & Daly. Halpin re-engraved the “10 cents” Davis stamp to produce only the 10¢ Blue type II, or “filed in” top and bottom scrolls designs issue. The stamps printed from the plates (A&D numbers 3 & 4) are designated CSA 12, and an identical estimated number to CSA 11 (23,800,000) were printed. Earliest use was May 1, 1863. CSA 11 and 12 also share the common fact that both were printed first by A&D and later by Keatinge & Ball (in 1864). The two printings can be distinguished by color. A small number of sheets CSA 11 and 12 were perforated in gauge 12 ½, but only from those printed by A&D.
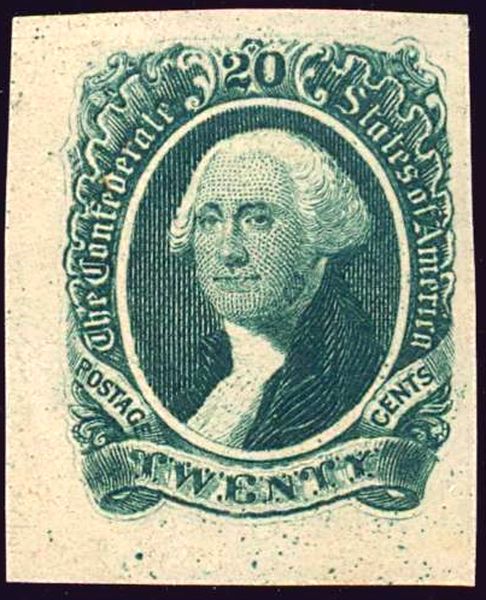
Frederic Halpin’s third and final engraving (after CSA 8 and 12) is the final CSA general issue stamp. It is the 20¢ Green Washington (CSA 13) and it is an engraving masterpiece. It was printed by A&D and was first issued in late May of 1863. Although the 20¢ stamp saw some use on double rate letters, such usages are uncommon. The stamp is unique to USA and CSA stamps, in that its primary intended and actual usage was to circulate as fractional currency, since the Confederacy had no coins for small change.
In consideration of their most interesting history, it is no wonder that Confederate postage stamps are such sought after collectables. I want to thank our Webmaster, Gordon Nelms, for inviting me to write this article. About one-half of what I have written is newly learned information, thus I have greatly benefitted from, as well as enjoyed, this assignment.
References: Collector’s Guide to Confederate Philately, John L. Kimbrough, MD and Conrad L. Bush, 2002; Dietz Specialized Catalog of the Postage Stamps of the Confederate States of America, 1930; Scott Specialized Catalogue of United States Stamps & Covers. 2018: The Confederate Philatelist, Vol. 61, No. 3, P. 19 (2016), (as to “color confusion”); Wikipedia, Postage stamps and postal history of the Confederate States, 2019.
All pictures were in the public domain at Wikipedia. No copyright notice was provided.
Tagging On Modern Postage Stamps
by
Bob Marousky
Detecting modern varieties
Stamp Tagging is one of the most intriguing parts of modern philately. With a simple UV detecting device you can uncover rare varieties of otherwise common stamps, significantly increasing the value of your collection.
HISTORY OF TAGGING
In the early days of US mail, letters were stamped and sorted by hand. This was of course an extremely time-consuming process.
By the early 1960s the Post Office Department (now called the USPS) began looking for a better way to process the mail. The machines first needed to find the stamps on the letters before they could be processed automatically.
Tagging the stamps with phosphorescent coating allows them to be easily seen under shortwave UV light. Ultraviolet or UV is broken down into different divisions. Shortwave is 200-300 nm (nanometers) and longwave is 350-400 nm.
If you've ever seen a black light poster then you can visualize how bright the colors stand out. A standard black light won't show tagging, but the concept is the same.
When tagging (zinc-orthosilicate) is exposed to strong shortwave UV light, the stamps glow a bright color that ranges from yellow-green to bluish green.
Without the UV light the taggant is clear and virtually invisible to the to our eyes.
Once the machines were able to locate the tagged stamps, the letters could be automatically turned (faced) and then cancelled.
Tagged stamps were first introduced to the public at Dayton Ohio in 1963. This has saved the government big bucks and uncounted labor hours over previous methods of sorting and processing by hand.
This is a modern machine called a culler-facer-canceller that is used to perform all of the jobs for us!
OK, here's the big secret: The machines don't actually "read" the value on the stamp; they merely detect the stamp, position it, and cancel it.
There has been some controversy in the past over folks purposely mailing letters with not enough postage and getting away with it since the machines don't know that exact amount affixed.
You should always properly frank your letters with full postage.
DIFFERENT TYPES OF TAGGING
There are 3 main ways that tagging is applied and then variations among the types. Some issues like Johns Hopkins of the Great Americans Series have 5 different combinations of tagging and paper types.
OVERALL TAGGING (OT)
The first tagging method ever used is called overall tagging. Liquid taggant was spread onto a rubber mat or cylinder and then transferred to the surface of the stamp. Johns Hopkins (2194b) above right is a visual example. Left is the same stamp under normal light or the appearance of an untagged stamp under UV. In most cases the taggant is "over all" of the stamp and the appearance is grainy.
The flexible tagging mat sizes don't always completely cover the sheets of stamps and result in untagged margins. This is one easy way to tell it apart from prephosphored tagging, which always completely covers all stamps and margins. Overall tagging is still used today.
Overall tagging is a clear coating that is applied to stamps after the design has been printed, but usually before perforation. This is done so that the liquid tagging doesn't flow through the perf holes onto the backs of the stamps.
When viewing under UV, you are looking through the haze of the fluorescence to see the stamp design below. This tints the design green and often masks the true colors.
The surface taggant will actually rub off onto your fingers fairly easily.
BLOCK TAGGING (BT)
The second main type called Block tagging occurs when it is applied to the surface of the stamp in a block shape. Johns Hopkins (2194) above shows block tagging. The sizes of the blocks vary greatly with each printing. Certain catalogue numbers are assigned by the size of the block alone. Gilbreth and Laubach at the top show small and large blocks.
The rubber mats also wear over time and there are unlimited varieties caused by this wearing. These include flaking, cracking and breaks. At times the impressions of stamps are actually worn into the mat. The stamps are then tagged with a ghostly transfer image of the design.
PREPHOSPHORED TAGGING (PP)
This is the third main method of modern tagging. The taggant is added to the raw paper before the vignette is printed. The final appearance of prephosphored tagging depends upon the coating that already exists on the paper.
Prephosphored coated stamps have a very solid appearance under UV like Hopkins (2194d) above. The coated paper allows the taggant to attach evenly to the surface of the smooth paper. Sometimes it is difficult to tell the difference between Overall tagged and Prephosphored tagged stamps. Since prephosphored stamps have the design printed over the tagging, the stamp design usually appears much bolder in comparison to overall tagging. (With OT the design is under the tagging).
Prephosphored uncoated stamps have a mottled or grainy appearance under UV. The paper is uncoated so the taggant soaks into the paper and pools in the fibers in an uneven way. The result is an often fainter tagging, which is occasionally bluish under UV by comparison like Hopkins (2194e with below.
AIRMAILS
U.S. Airmails from C59 to C90 glow an orange-red color (calcium silicate) under shortwave UV (instead of green) and are overall tagged! Airs from C91-now glow green.
PREPHOSPHORED INK
Stamps can also be printed with the phosphorescence added directly to the printing ink. The result is a stamp that glows only in certain parts of the stamp design where that ink is applied.
Taggant can also be applied in a band or a stripe that runs across several stamps.
At times more than one of these methods are combined!
UNTAGGED ERRORS
Under shortwave UV light, they show no reflective glow. They occur accidentally when tagging is missing or only partially applied during printing. They are considered an error of missing color. Finding an untagged error is thrilling. Often they are literally hidden in plain sight!
Modern stamps denominated 10c and under are intentionally untagged. This is done to prevent the low-values from triggering the canceling equipment.
Precancels and service inscribed stamps are not usually tagged because they are routed differently and not cancelled.
Sometimes the tagging coincides with specific types of paper and the tagging type can be determined without even using a UV lampby simply turning the stamp over and inspecting the gum!
(But surely that trick is a topic for another guide)
Ready to buy a lamp and get started?
ULTRAVIOLET LAMPS
*All iHobb.com UV Lamps are specific for use by stamp collectors.*
To see tagging you need a shortwave UV lamp. Most shortwave UV lamps today emit at 254 nm and with the proper filter will reveal stamp tagging.
There are basically 2 types of UV stamp lamps -plug-ins (left above) and portables (above right). In my opinion Raytech Industries make the best tagging lamps for stamps. My plug-in is time tested over 30 years and in use daily. It is powerful and durable and I see everything!
Safe has a good battery operated model for the road.
ADVANTAGES
• The advantages of a plug in lamp are that the powerful bulb and filters allow you to clearly see all taggant. Many counties other that USA use tagging and a good lamp will show all of the variety.
• Often these heavy-duty lamps have a switch or slide that will allow you to also see long wave UV 350-400 nm. Long wave fluorescence concerns ink and paper brighteners and is different from tagging but useful to specialists (lamps are often 366 nm).
• Portables or battery-operated lamps are good for shows and times when you don't have electrical access.
• Battery operated portable lamps are inexpensive.
DISADVANTAGES
NEVER STARE DIRECTLY AT THE BULB!
• Plug-ins get hot and continued long-term exposure to the light can damage your eyes. The light can cause a "sunburn" type irritation. Wearing glasses can reduce the effects. The lamps are typically safe when handled properly.
• Plug-ins need to be plugged in and access isn't always available at stamp shows, etc. They are bulky and heavy if you don't have a UV stand to hold the light. They are expensive.
• Portables are unfiltered and weak in comparison. Often it is difficult to tell the more subtle differences. Portable lamps can emit so much white light that faint tagging is lost in the glare.
Article from: https://www.ihobb.com/c/STAMP_TAGGING.html
A UV lamp is an essential item for serious Machin stamp collectors. So what's the difference between short-wave and long-wave UV and what do these specific lamps reveal?
Most British stamps can be readily identified by their values, design, colour, perforations, watermarks and other visible or measurable characteristics. But for collectors of modern British stamps, especially the Machin series of definitive issues, the fluorescence of inks, the phosphor bands and coatings may need to be seen to properly identify stamps or confirm errors and varieties.
A short-wave UV lamp will clearly reveal most of the different phosphor bands found on Machin (and other) stamps. It becomes easy to spot "short bands" and reveal paper differences including the all over phosphor coated papers. It also enables you to check stamps that appear to have missing phosphor bands to the naked eye and avoid expensive mistakes when the presence of phosphor is only confirmed under UV light.
Long-wave UV light helps reveal the often subtle differences between yellow and blue fluors and can also check for less frequent afterglow characteristics. While all phosphor types have an afterglow under short-wave UV, only a few possess the same properties under long-wave UV. Long-wave UV will also reveal the fluorescent characteristics of some printer inks.
It's not just collectors of modern GB stamps that can benefit from viewing stamps under UV light. Repairs and paper thins can seriously affect the value of all stamps from the Queen Victoria era onward and viewing under UV light can often reveal paper faults or repairs that are virtually invisible to the naked eye. In addition to fault checking, some stamps from the reigns of King Edward VII and George V have fluorescent characteristics which can help distinguish between printers and confirm stamp shades etc.

December 1, 2018
Ms Henderson,
Please accept this encased 20 cent America’s Libraries stamp as a token of our appreciation for the positive working relationship between the St. Martin Library and the Gulf Coast Stamp Club. Our Club has been meeting here since Hurricane Katrina destroyed our meeting place in Biloxi. The meeting room is an ideal location for our members and your staff has always been friendly and positive.
A 20-cent commemorative stamp honoring America's Libraries was issued July 13, 1982, in Philadelphia, Pennsylvania. The First Day of Issue ceremony was held in the Philadelphia Civic Center during the annual convention of the American Library Association.
Bradbury Thompson of Riverside, Connecticut, designed the stamp, which honors the contributions of our nation's libraries to the growth and development of the United States. “Mr. Thompson, an authority on typography, depicted in his design letters of the alphabet and the geometric construction grids used by type designers to shape and form letters for the printing of books and other items.” The letters depicted are from a rendering of the alphabet done in 1523 by Geofroy Tory of Bourges, France, which appeared in the book "Champ Fleury," published in 1526. The typeface used is compatible with Tory's original. It was originally cut by Tory's famous student, Claude Garamond, in about 1532, and today is known in its updated form as the font called "Sabon Antigua."
We look forward to a long relationship.
Robert O’Dell
President Gulf Coast Stamp Club
Filatelia de Cuba
December 19, 2018
A Fire to Hide a Theft
December 19, 2018
Albert Allegue
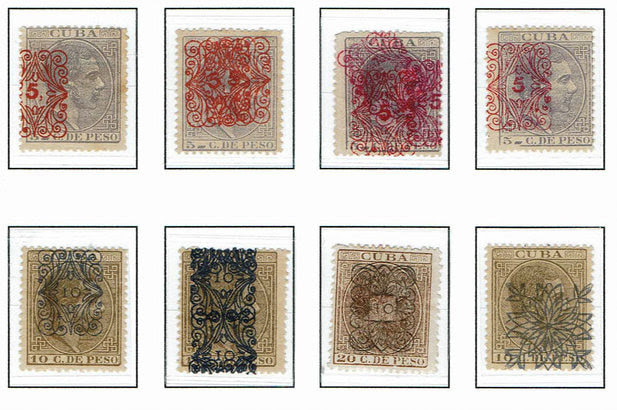
On the night of April 9-10 of 1883, the Revenue Administration Building in Havana was on fire destroying a portion of the building, and specifically, an area designated as stamp storage. Investigations revealed it was arson in an effort to cover up extensive theft of the 5, 10, and 20 centavos postage stamps and other tax stamps dated 1882. To minimize the theft, and in an attempt to catch the thieves, the government in Havana decreed that existing stocks of 1882 postage and revenue stamps would have surcharges printed on the face of the remaining stamp inventory. The public would be permitted to exchange their previously purchases stamps for the new surcharged ones. Unfortunately, the government's efforts failed, as it is now known that the thieves were able to exchange their holdings without being caught.
The task of printing the surcharge was given to a local Havana print-shop, "La Propaganda Literaria" with instructions that all the printing would have to be done in a 24 hour period. As you can imagine, the surcharges were printed in such a haste that it created numerous printing errors that are now a delight of stamp collectors.
There were five different types of surcharges made up in plates of 25 cliches, arranged 5X5. They were applied on 25 stamps at a time, on the sheets of 100, arranged 10X10. Any conceivable combination of surcharge - double and triple surcharge, two or more ink colors, commas instead of periods, or just missing periods, have been found. The surcharges were generally applied in red ink to the 5c., stamps, blue on the 10c., stamps and black on the 20c., stamps. However, because ink in 1882 was purchased from Spain, the printer lack sufficient colored ink and was forced to mix existing supplies of similar inks to come up with the required ink. In addition, in a few rare instances the 10c., surcharged designed to be printed on the 10c., stamp was instead printed on the 20c., stamp creating valuable errors (see below)..
Here are a few examples:
Cuban Propaganda Stamps
by
Al Alleque
by
Al Alleque
| Cuban Propaganda.pdf | |
| File Size: | 9061 kb |
| File Type: | |
A Novice’s Approach to Topical Stamp Collecting
by
Tom Adams
| topical_collecting_for_website.pptx | |
| File Size: | 4426 kb |
| File Type: | pptx |
Mississippi's Proprietary Stamp
by
Cathy Marousky
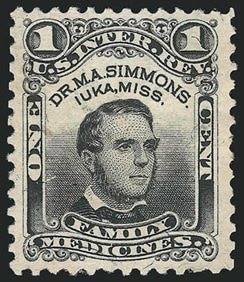
Taxes aren’t new. After the Civil War the United States gov’t levied taxes on many common items such as photographs (the stamp would be on the back of the photo), matches, medicine etc. Those who produced and sold a patent medicine could pay the tax using a stamp of your own design. Medicine producers provided the design for the stamp then paid a small fee for the government to print the stamp that would be used on the medicine box or bottle. These were called Proprietary Stamps – a type of revenue stamp.
There was only one patent medicine producer in Mississippi. His name was Dr. M.A. Simmons and he was from Iuka, MS. Later he moved to St. Louis. He simply changed the Iuka, MS to St. Louis, MO and continued using the same stamp.
There was only one patent medicine producer in Mississippi. His name was Dr. M.A. Simmons and he was from Iuka, MS. Later he moved to St. Louis. He simply changed the Iuka, MS to St. Louis, MO and continued using the same stamp.
